Skip to content

7 Tips for Choosing a DIN Abrasion Resistance Tester?

Choosing a DIN Abrasion Resistance Tester is not simply a matter of comparing prices or reading product brochures. The right instrument should produce stable, traceable, and repeatable results under DIN 53516 testing conditions. In a real laboratory, small details matter. A worn abrasive sheet, uneven specimen pressure, or a dusty test chamber can change the final volume-loss value.

Tribologist Dr. Bharat Bhushan describes the field clearly: “Tribology is the science and engineering of interacting surfaces in relative motion.” That principle is central to abrasion testing. The tester, abrasive cylinder, load system, specimen holder, and operator all interact during measurement. Therefore, equipment selection should examine more than motor power. Buyers should check abrasive calibration, load accuracy, rotation control, specimen alignment, dust removal, and data-recording capability. Service support also deserves attention. A technically impressive machine becomes a poor investment when spare parts are difficult to obtain.

No tester is perfect.

This guide presents seven practical tips for choosing a DIN Abrasion Resistance Tester. It considers laboratory experience, compliance evidence, repeatability, maintenance demands, and long-term operating cost. Some recommendations may appear obvious, yet they are often overlooked during purchasing. One limitation also deserves honesty: a tester cannot represent every field-wear condition. Rubber compounds may perform differently under heat, moisture, impact, or mixed contaminants. For that reason, DIN abrasion results should support material decisions, not replace engineering judgment. A careful buyer leaves room for verification, comparison testing, and occasional doubt.
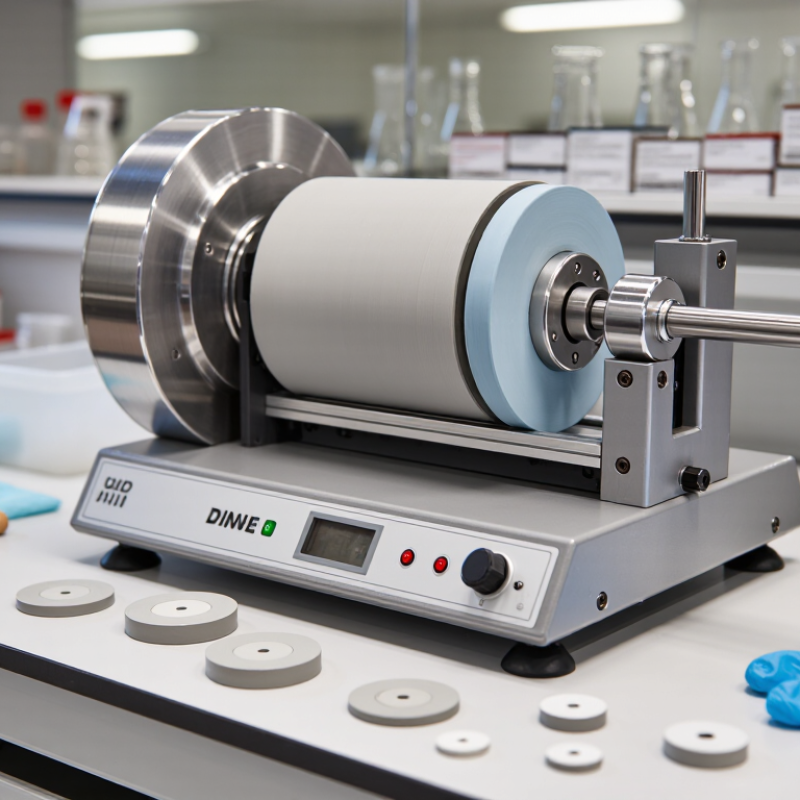
7 Tips for Choosing a DIN Abrasion Resistance Tester?

Understanding DIN Abrasion Testing and Its Measurement Requirements

Choosing a DIN abrasion resistance tester requires more than comparing prices or display screens. The measurement depends on controlled pressure, abrasive material, rubbing distance, and specimen preparation. Check whether the instrument follows the applicable DIN procedure used by your laboratory. Ask for traceable calibration records, not only a compliance statement. The load system should remain stable during testing. Small pressure changes can alter mass loss.

Consider seven practical points: verify the test stroke, inspect the abrasive paper holder, confirm the specimen size, and examine the balance resolution. Also check whether the machine records test cycles accurately, controls loose particles, and supports repeat testing. A clear fixture matters. If the sample shifts slightly, the wear track may become uneven. That result can look precise while hiding a setup error.

Measure the specimen before and after abrasion under consistent conditioning. Record mass loss, then calculate volume loss when material density is relevant. Keep temperature and humidity stable, especially for rubber or flexible compounds. In daily laboratory work, cleaning the drum and replacing worn abrasive paper often improves repeatability more than software changes. No tester is perfect. Operators still influence results through trimming, clamping, and timing. I have seen careful teams overlook sample thickness variation. That small detail deserves review before purchasing equipment. Choose a tester with accessible adjustments, readable controls, and service support that provides documented verification rather than vague promises.

DIN Abrasion Resistance Testing: Core Measurement Requirements

This chart summarizes key setup values commonly used for the 10 N DIN abrasion procedure: a 40 m abrasion distance, a 16 mm specimen diameter, a 6 mm specimen thickness, and a 10 N test force. Abrasion resistance is evaluated from the measured mass loss and material density to calculate volume loss in mm³.

Reference basis: DIN 53516 and the corresponding ISO 4649 abrasion-testing methodology. Always verify the latest applicable standard and test method before selecting equipment.

Defining the Material Types and Testing Standards to Be Evaluated

Choosing a DIN abrasion resistance tester begins with the material under evaluation. Material comes first. Rubber compounds, elastomer sheets, footwear soles, plastics, and coated fabrics may react differently to the same abrasive path. A soft rubber sample can lose substantial volume, while a dense plastic may show only a shallow mark. The tester must support the specimen shape, thickness, applied load, and expected wear mechanism.

DIN 53516 and ISO 4649 are common references for rubber and elastomer abrasion testing. They typically assess volume loss after a controlled rubbing distance against abrasive paper. However, similar-looking procedures may use different loads, specimen holders, or calibration requirements. That mismatch matters. Check whether your material falls within the standard’s scope before purchasing equipment. A tester designed for routine rubber specimens may not suit irregular soles or laminated samples.

TESTING CONDITIONS deserve equal attention. Control temperature and humidity before measurement, because moisture can change friction and mass readings. Confirm the abrasive grade, drum speed, travel distance, and reference compound requirements. Experienced technicians also inspect the abrasive surface regularly; worn paper can produce misleadingly low wear. Document everything. Even small deviations can affect repeatability. I have seen operators focus heavily on machine resolution while overlooking specimen conditioning. That was not a good assumption. Reconsider the test method when field performance and laboratory results disagree, and verify the latest standard edition before finalizing the specification.

Comparing Tester Design, Abrasive Components, and Operating Controls

Choosing a DIN abrasion resistance tester requires more than reading its advertised abrasion volume. Examine the frame, drum alignment, specimen holder, and dust control. A rigid frame reduces vibration during long runs. ISO 4649:2017 uses controlled contact pressure and a defined abrasion path, so mechanical stability directly affects repeatability. A clear viewing window helps operators spot uneven wear. It can also reveal dust buildup before results drift.

The abrasive component deserves equal attention. Check the abrasive paper grade, backing, width, and replacement procedure. ISO 4649:2017 commonly specifies calibrated abrasive paper, while ASTM D5963 also emphasizes controlled abrasive conditions. Small differences in grit or tension can change the measured volume loss. Ask for certificates, batch records, and a practical replacement interval. Cheap abrasive media may become expensive through repeated retesting. That trade-off is easy to miss.

Operating controls should show load, drum speed, test distance, and stop conditions clearly. A 10 N load is widely used in standardized rubber abrasion procedures, but the machine must maintain it consistently. Digital controls improve traceability when operators test different compounds. Still, automation cannot correct poor specimen preparation. I would test the alarm system, emergency stop, and calibration routine before purchase. A polished interface can mislead. Reviewers should compare raw mass loss, specimen images, and repeatability data from several runs. Even then, one weakness remains: laboratory consistency may not represent actual footwear or flooring wear.

7 Tips for Choosing a DIN Abrasion Resistance Tester? - Comparing Tester Design, Abrasive Components, and Operating Controls

Tip Selection Dimension What to Compare Relevant Technical Information Practical Check
1 Applicable test standard Check whether the instrument supports the required DIN or ISO abrasion method and its specified procedure. DIN 53516 has been superseded in many applications by ISO 4649, which evaluates the volume loss of rubber or elastomer specimens after contact with abrasive cloth. Request the test-method statement, operating manual, and calibration procedure before purchase.
2 Drum and tester design Compare drum geometry, specimen holder alignment, rotation stability, and access for cleaning. A DIN-type tester uses a rotating cylindrical drum covered with abrasive cloth. Stable specimen contact and consistent travel are essential for repeatable wear results. Check for a rigid frame, adjustable alignment, guarded moving parts, and a removable or easily serviceable drum surface.
3 Abrasive cloth specification Verify abrasive grain size, backing material, width, joining method, and traceability. ISO 4649 commonly uses abrasive cloth with nominal P60 grain size. The abrasive surface should be uniform, securely mounted, and replaced at the interval defined by the selected method. Confirm that each roll or strip has documented grain classification, lot identification, and storage instructions.
4 Test force and loading system Compare dead-weight loading, spring or pneumatic loading, force adjustment, and force verification. Common DIN/ISO rubber abrasion procedures use a defined test force, often 10 N for standard configurations. The exact force must follow the selected method and specimen arrangement. Choose a system that allows the applied force to be checked with a calibrated force gauge or certified weights.
5 Operating controls Evaluate control of drum speed, test distance, start/stop operation, and safety interlocks. A commonly used procedure specifies approximately 40 m of relative abrasive travel. The tester should maintain a constant speed and stop automatically at the programmed distance. Prefer a digital distance counter, repeatable preset cycles, emergency stop protection, and a clear status display.
6 Specimen dimensions and measurement Check specimen-holder compatibility, exposed contact area, weighing resolution, and density measurement workflow. DIN/ISO abrasion results are generally reported as volume loss, so mass loss must be related to specimen density. A precision balance and controlled specimen preparation are important. Confirm the holder dimensions, balance readability, specimen conditioning requirements, and whether the software records mass, density, and calculated volume loss.
7 Calibration, repeatability, and maintenance Compare calibration access, reference materials, service requirements, data records, and cleaning provisions. A reference rubber or control specimen can be used to monitor instrument performance. Abrasive wear, contamination, force error, and specimen misalignment can affect results. Select equipment with documented calibration intervals, replaceable wear parts, test-result export, and a clear preventive-maintenance schedule.

Note: Test force, abrasive travel, specimen dimensions, conditioning, and reporting requirements must be set according to the exact DIN or ISO procedure specified for the material.

Checking Accuracy, Repeatability, Calibration, and Safety Features

Choosing a DIN abrasion resistance tester starts with measurement accuracy. DIN 53516 specifies a 40-metre abrasion path, a 10-newton load, and controlled specimen dimensions. Small deviations can change the reported volume loss. Check the load cell, shaft speed, abrasive path, and specimen holder before purchase. ISO 4649:2017 also separates test methods, so the instrument must match your intended procedure. A cheaper machine may appear adequate. It may not control pressure consistently.

Repeatability deserves direct evidence. Ask for laboratory data, not only a brochure claim. ASTM E177-20 distinguishes repeatability from reproducibility, which helps separate operator effects from equipment variation. NIST Technical Note 1297 recommends reporting measurement uncertainty with defined sources. Request uncertainty budgets, repeat-test results, and raw calibration records. Calibration should be traceable under ISO/IEC 17025:2017, with documented intervals for load, speed, distance, and dimensions. Annual calibration is common, but heavy use may require shorter intervals. I would challenge that assumption.

Safety details are practical, not decorative. Look for a guarded rotating drum, a functioning emergency stop, lid interlocks, stable footing, and controlled abrasive dust. OSHA’s 2023 workplace injury data recorded 2.6 million nonfatal private-industry cases in the United States, reminding laboratories that routine machines still deserve risk controls. Verify electrical protection and cleaning access. A perfect test result means little if the operator works around exposed moving parts.

Assessing Supplier Support, Maintenance Needs, and Total Equipment Cost

7 Tips for Choosing a DIN Abrasion Resistance Tester?

The purchase price rarely reflects the real equipment cost. The U.S. Department of Energy’s Operations and Maintenance Best Practices Guide reports that effective preventive maintenance can reduce maintenance costs by 10–40%. Ask suppliers for service intervals, calibration fees, spare-part prices, and technician response times. A clear maintenance schedule matters. So does local technical support. Confirm whether training includes specimen preparation, load settings, drum inspection, and result interpretation. Small setup errors can distort abrasion-loss results.

Supplier support should include traceable calibration and documented service records. ISO/IEC 17025 principles support reliable measurement through calibrated equipment and competent procedures. Request sample certificates before ordering. Check whether the supplier explains uncertainty, reference materials, and corrective actions. Vague answers are warning signs. They happen.

Total equipment cost also includes electricity, consumables, software updates, downtime, shipping, and operator training. Deloitte’s 2022 Global Smart Manufacturing Survey found that 86% of manufacturers expect smart manufacturing investments to strengthen competitiveness. That finding does not mean every digital feature deserves extra money. Choose data export and audit trails when your quality system needs them. Avoid paying for dashboards nobody will use. I would also challenge optimistic uptime claims. Ask for documented service records, warranty limits, and the average repair time from comparable installations. A cheaper tester can become expensive when one missing part stops testing for two weeks.